Building
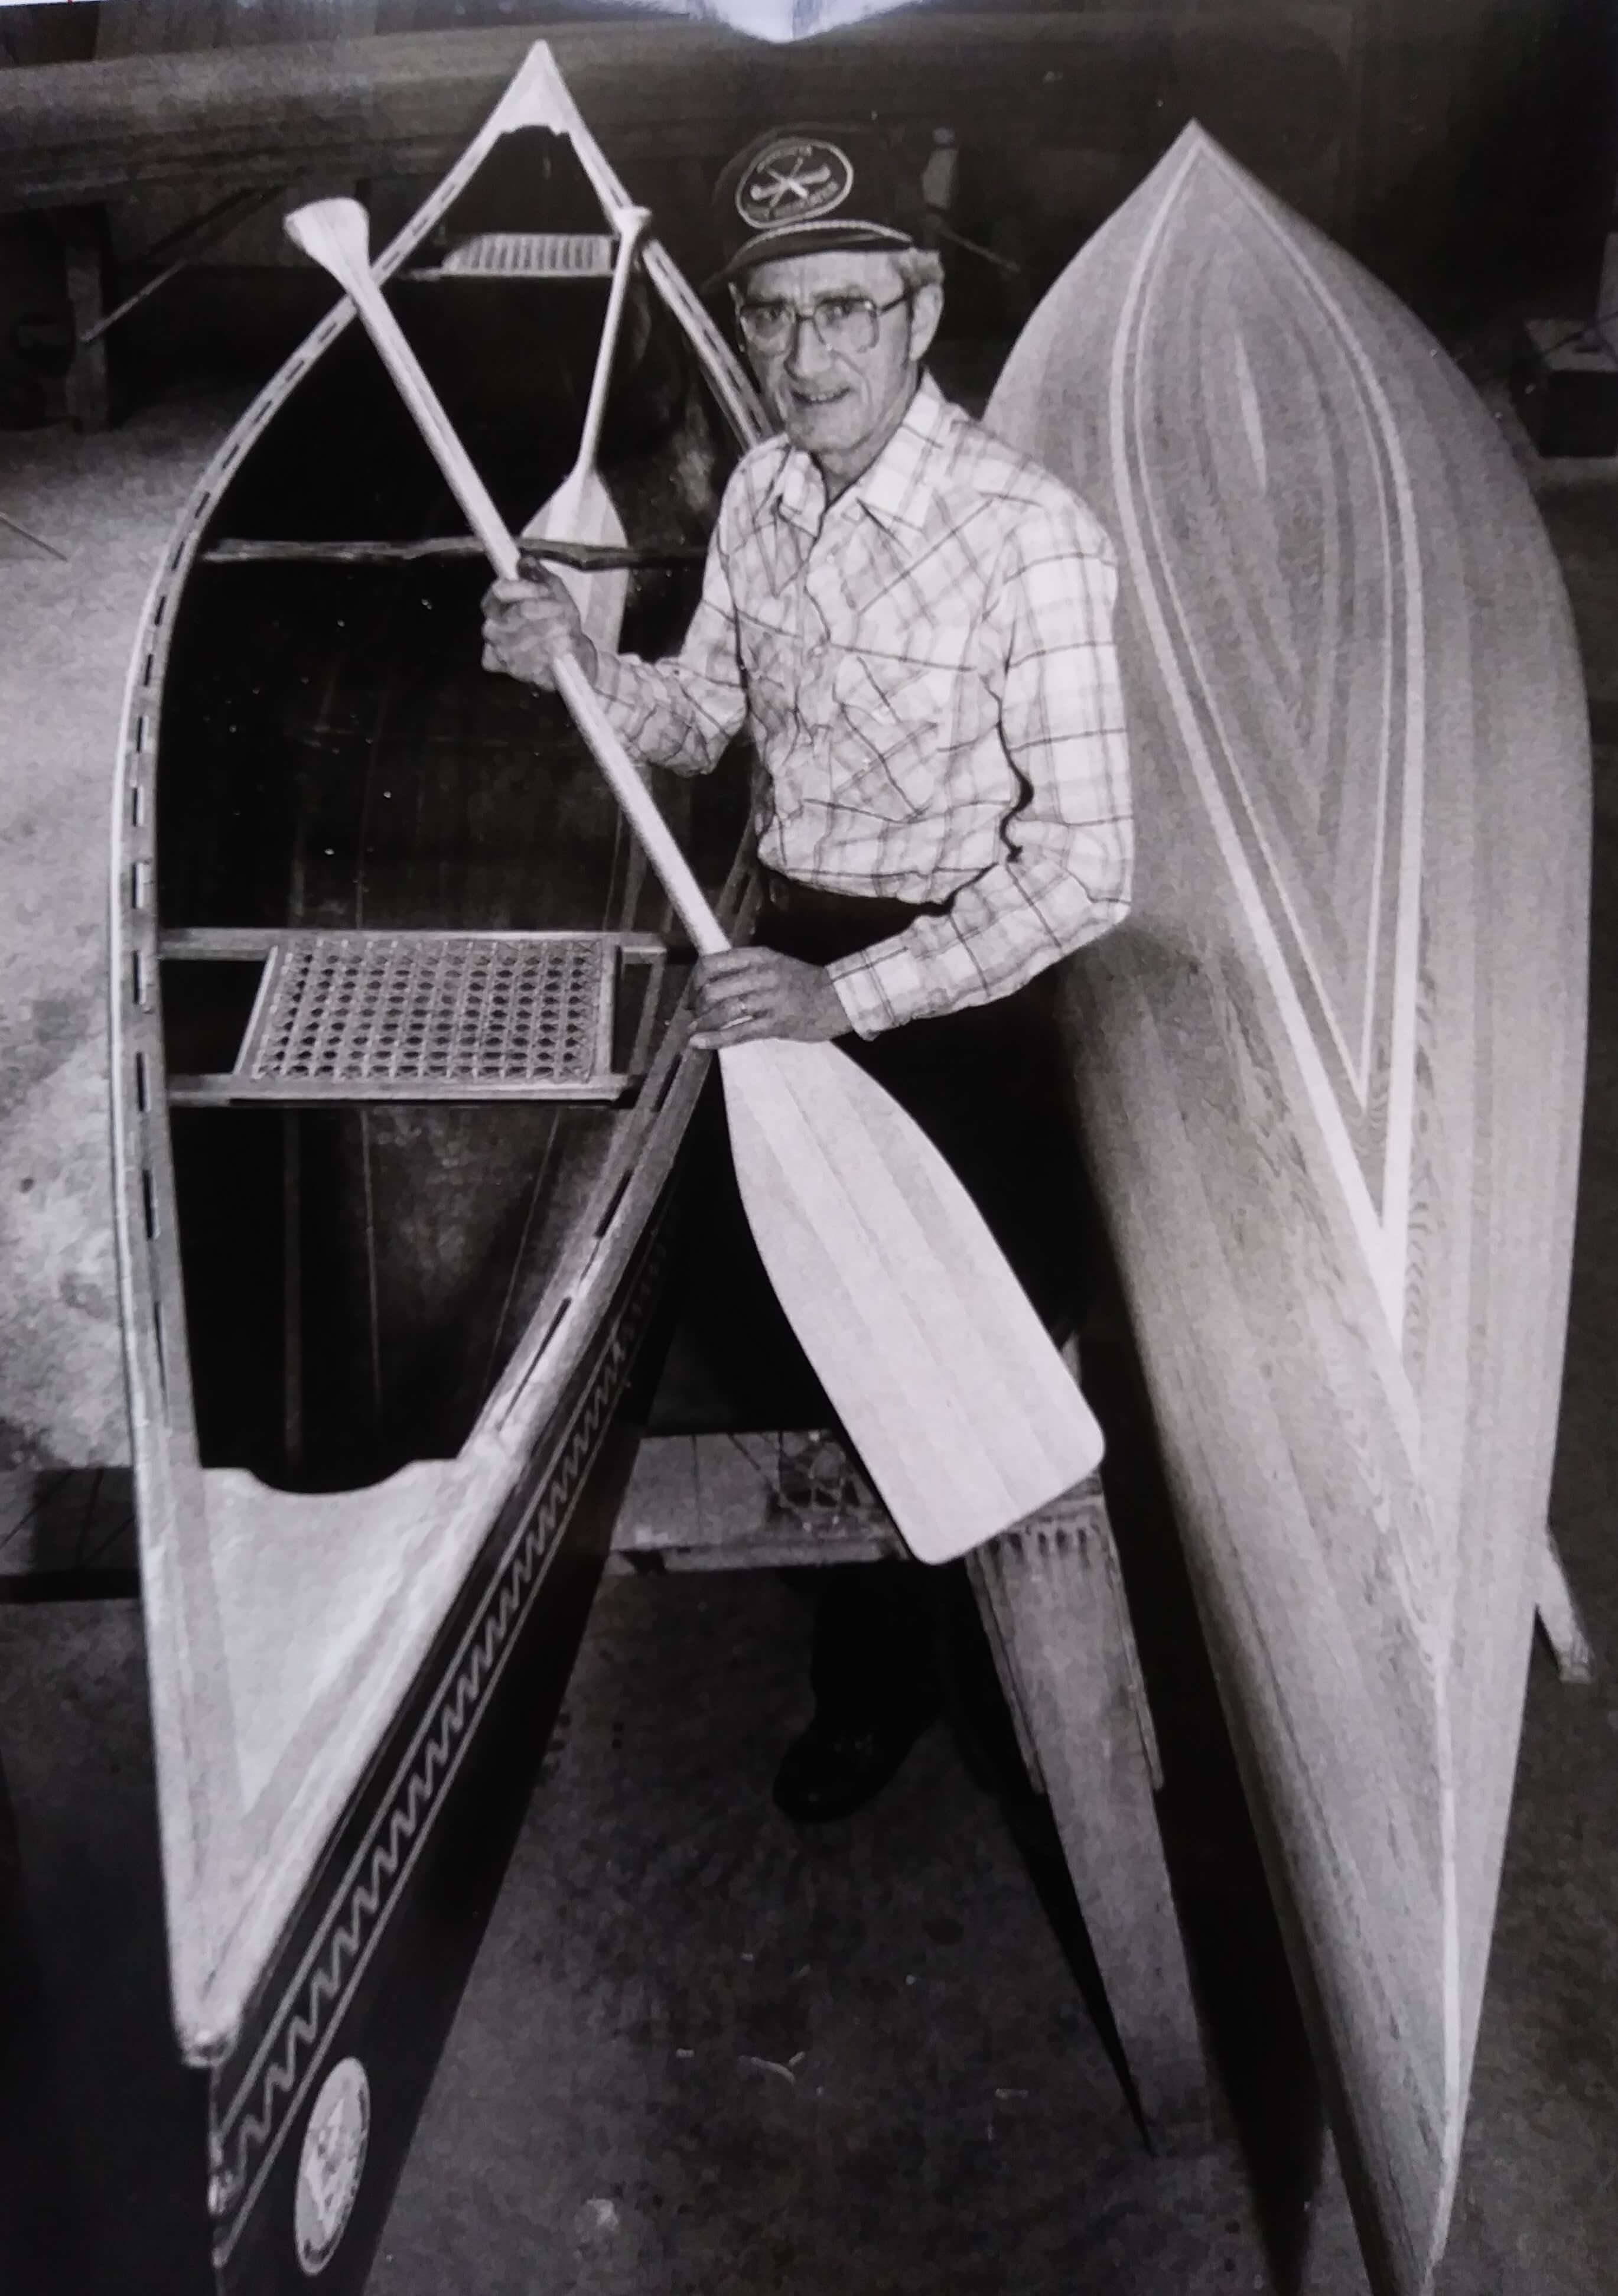
Here at Zapf Legacy Canoes we use time tested methods of creating canoes for you. Steve’s father, Mike, started creating canoes in 1967 with directions from a Popular Mechanics Magazine. The family built a couple canoes by these instructions with the family tweaking them with each canoe. Over the years the family met other builders and together they shared their methods. Steve built his first canoe with his dad when he was 13 years old. This canoe was entered into an adult builders contest and took 2nd place.

Our canoes are built from wood strips we make that are approximately ¾ inch high and ¼ inch wide. The length depends on the canoe and length of boards available. We started out using redwood until around 1986, due to the rising cost we switched to cedar. If a client wishes for us to use redwood we still can. The two woods bend and sand alike.


Other woods we use for the gunnels, seats, thwarts and yoke are from hardwood such as ash, black walnut, maple or cherry. Amy uses her background in interior design for display canoes to help our clients pick wood that complements the room the canoe is displayed.

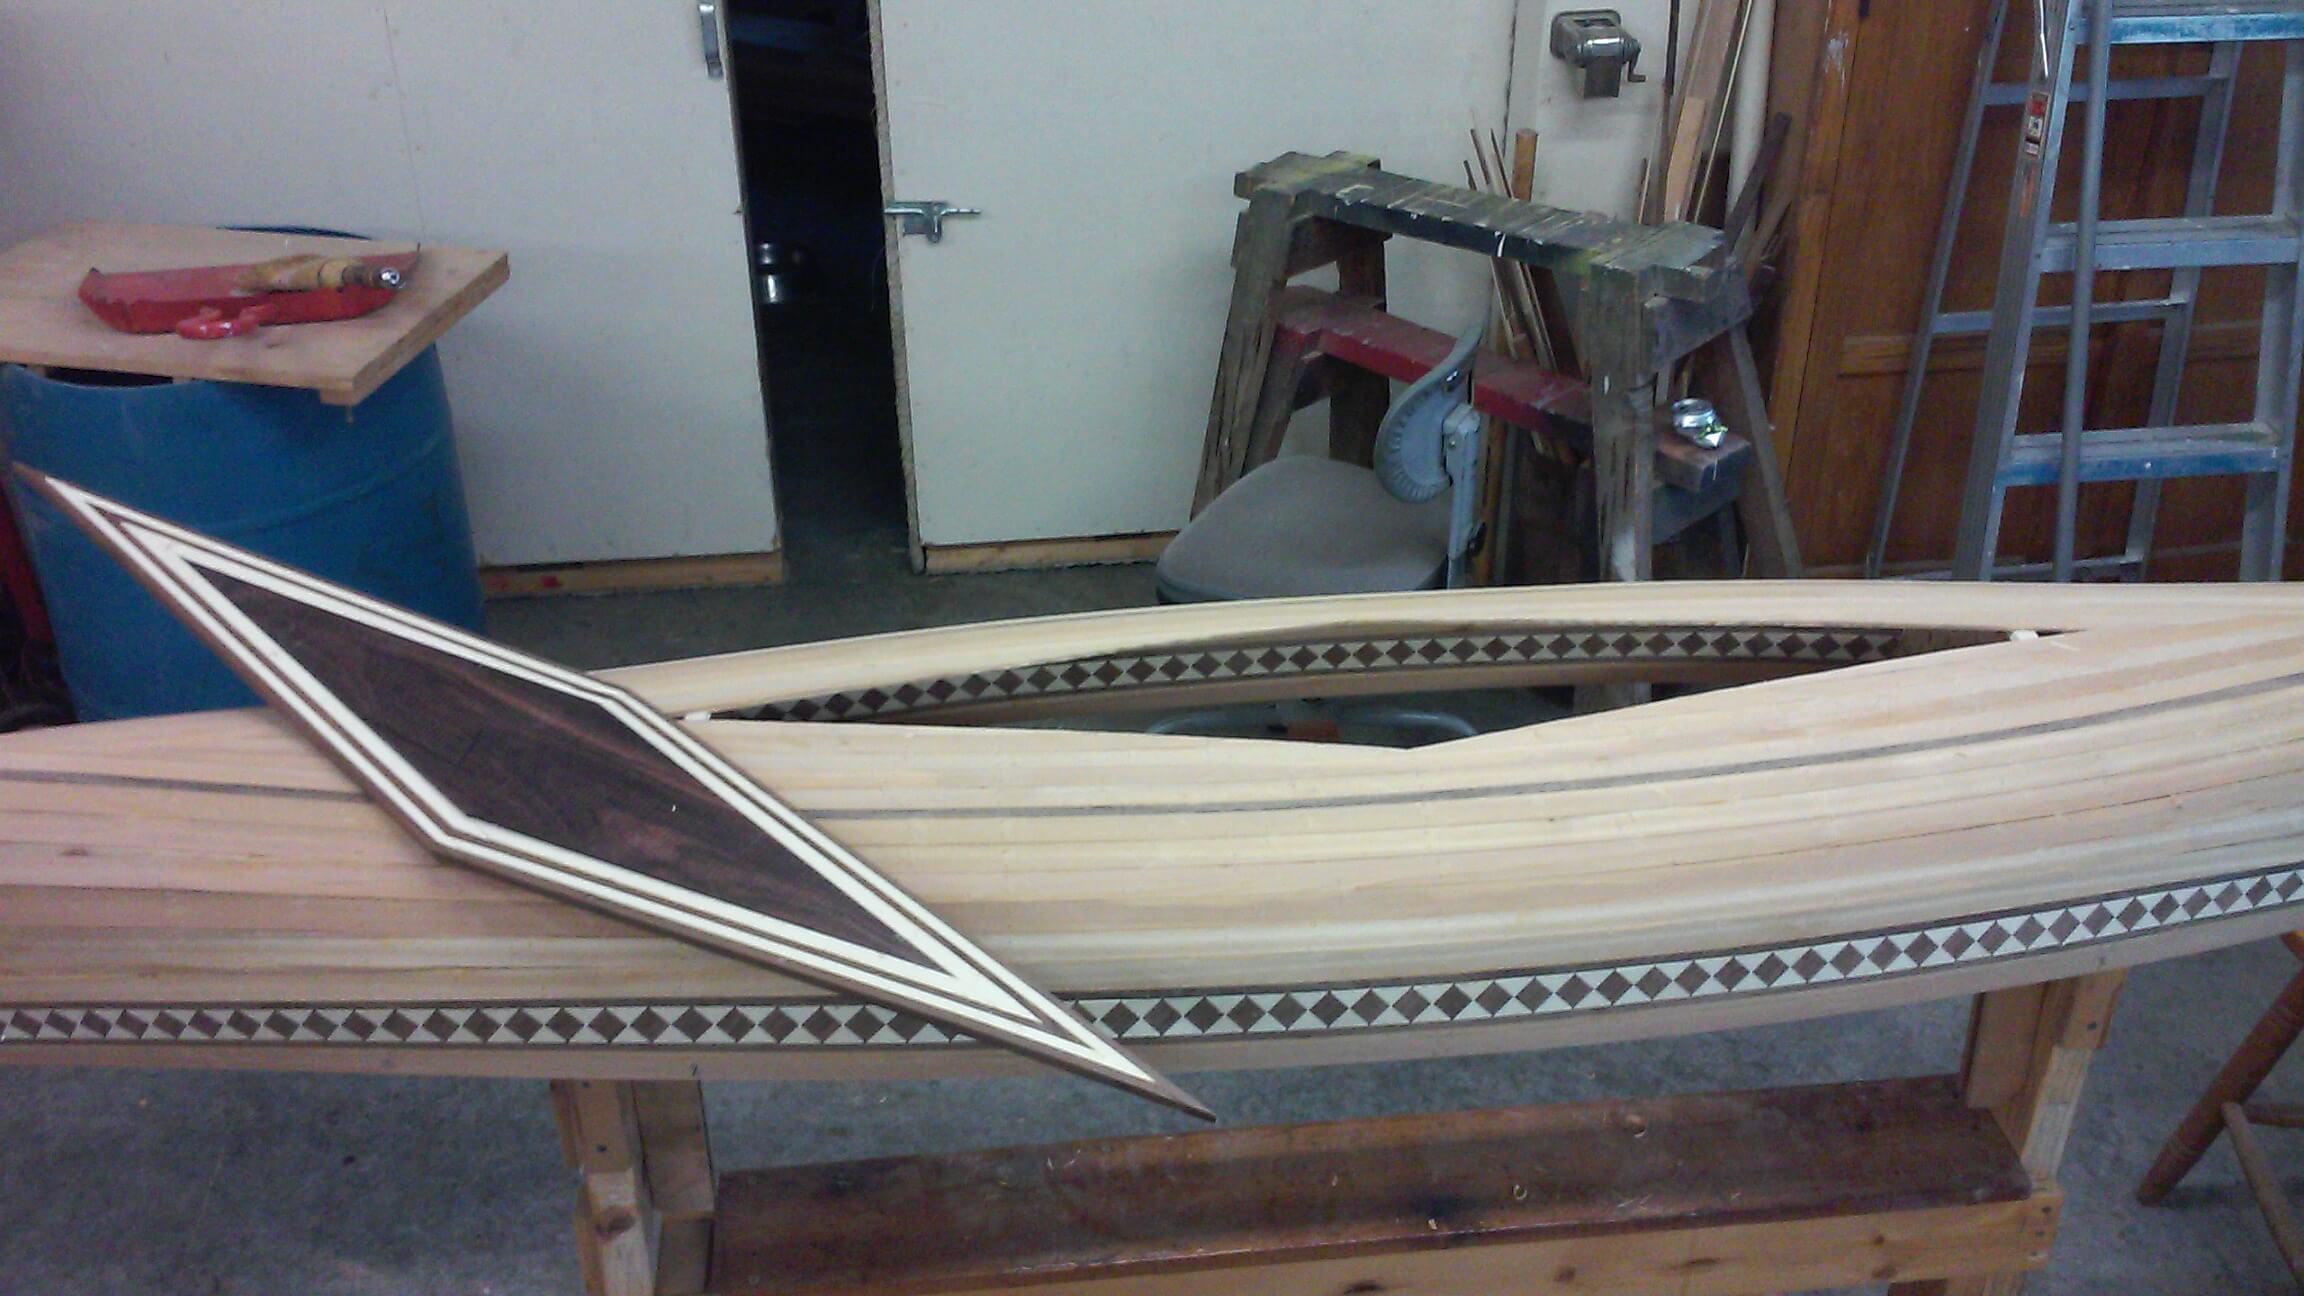
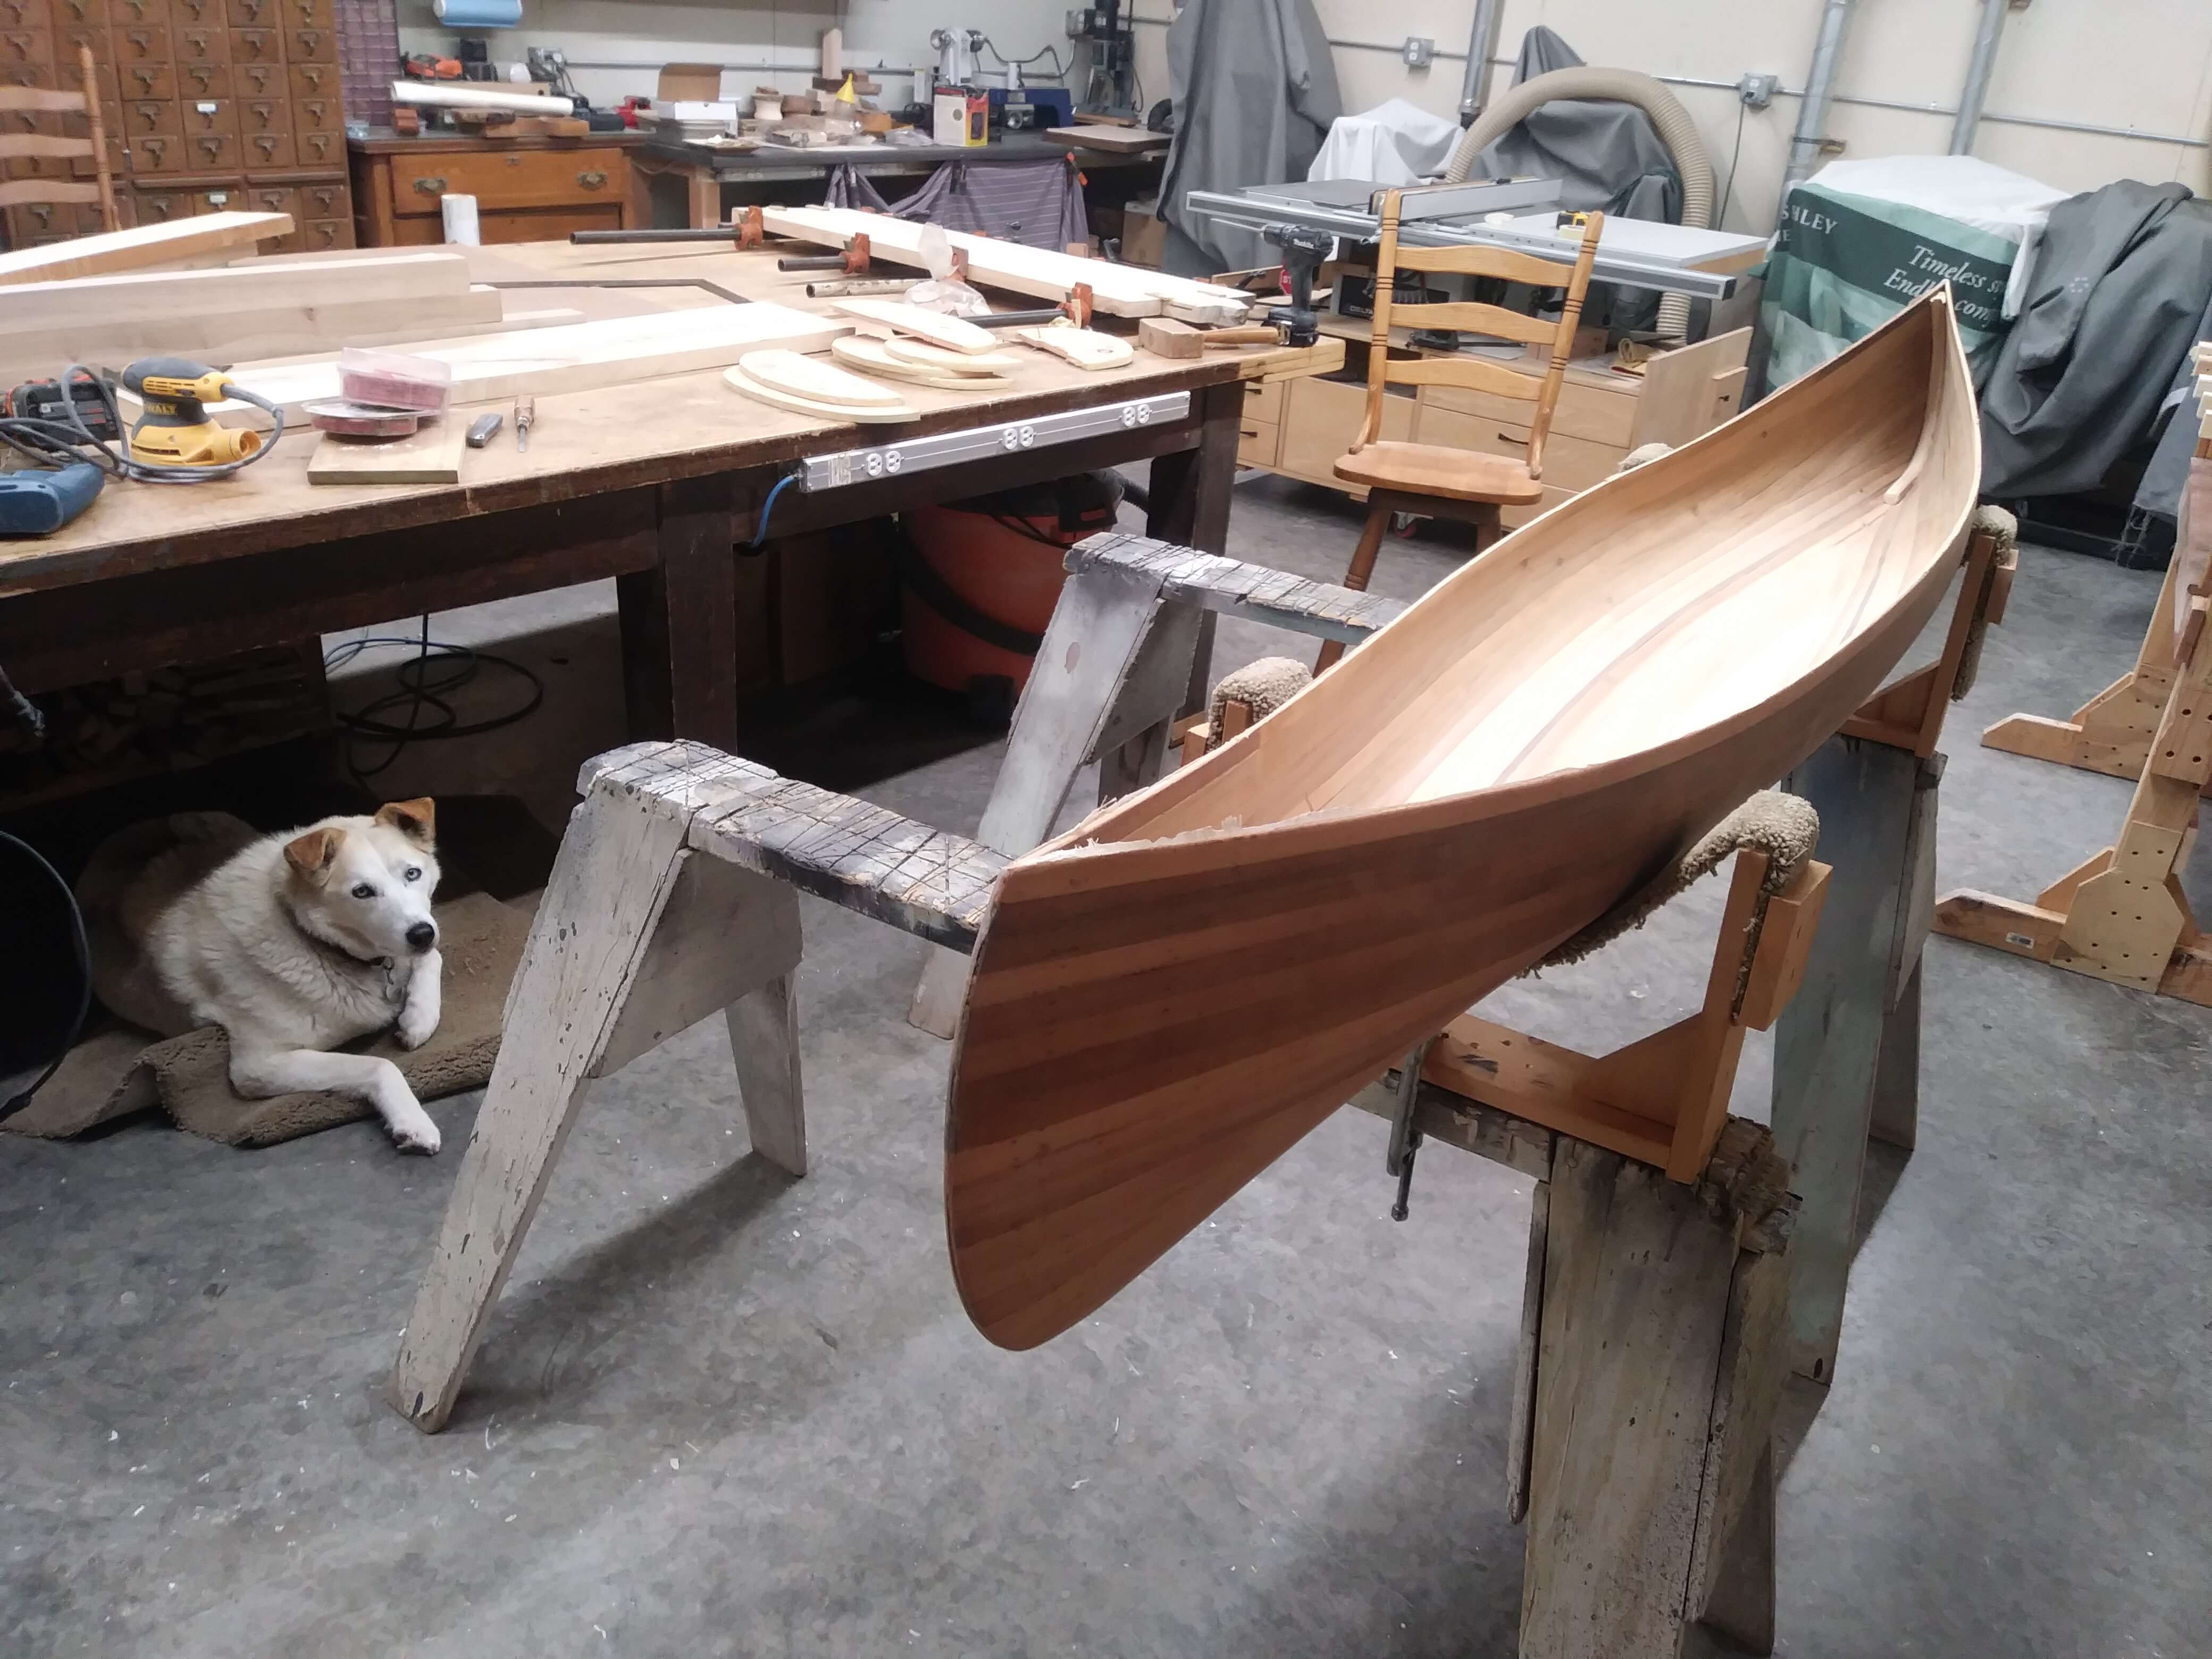
The wood strips we use are cut by the Zapfs’ in our woodshop. These strips are attached to forms that are the shape of the desired canoe. We use a stem piece that is at each end of the canoe. The side strips are attached to the stem piece and stay with the canoe. The strips are generally attached to the forms with staples. Each additional strip is added with wood glue between them and smaller staples to hold them together. Once the glue is dry and the canoe’s shape is complete ALL those staples are pulled out. We have made canoes without the use of staples, it creates a different look and takes more skill and time to accomplish.


To enhance a canoe’s look our family has created different side patterns throughout the years. Mike and Steve developed their own method of cutting the small pieces and then adding them to the canoe. Steve noticed one year that the bottom of theirs canoes, though pretty, could have something added for design. His first diamond inlay was only 5 inches square. The bottom designs have expanded to include large 2 foot long diamonds or their north star design. We use wood with natural contrasting color to great our designs.

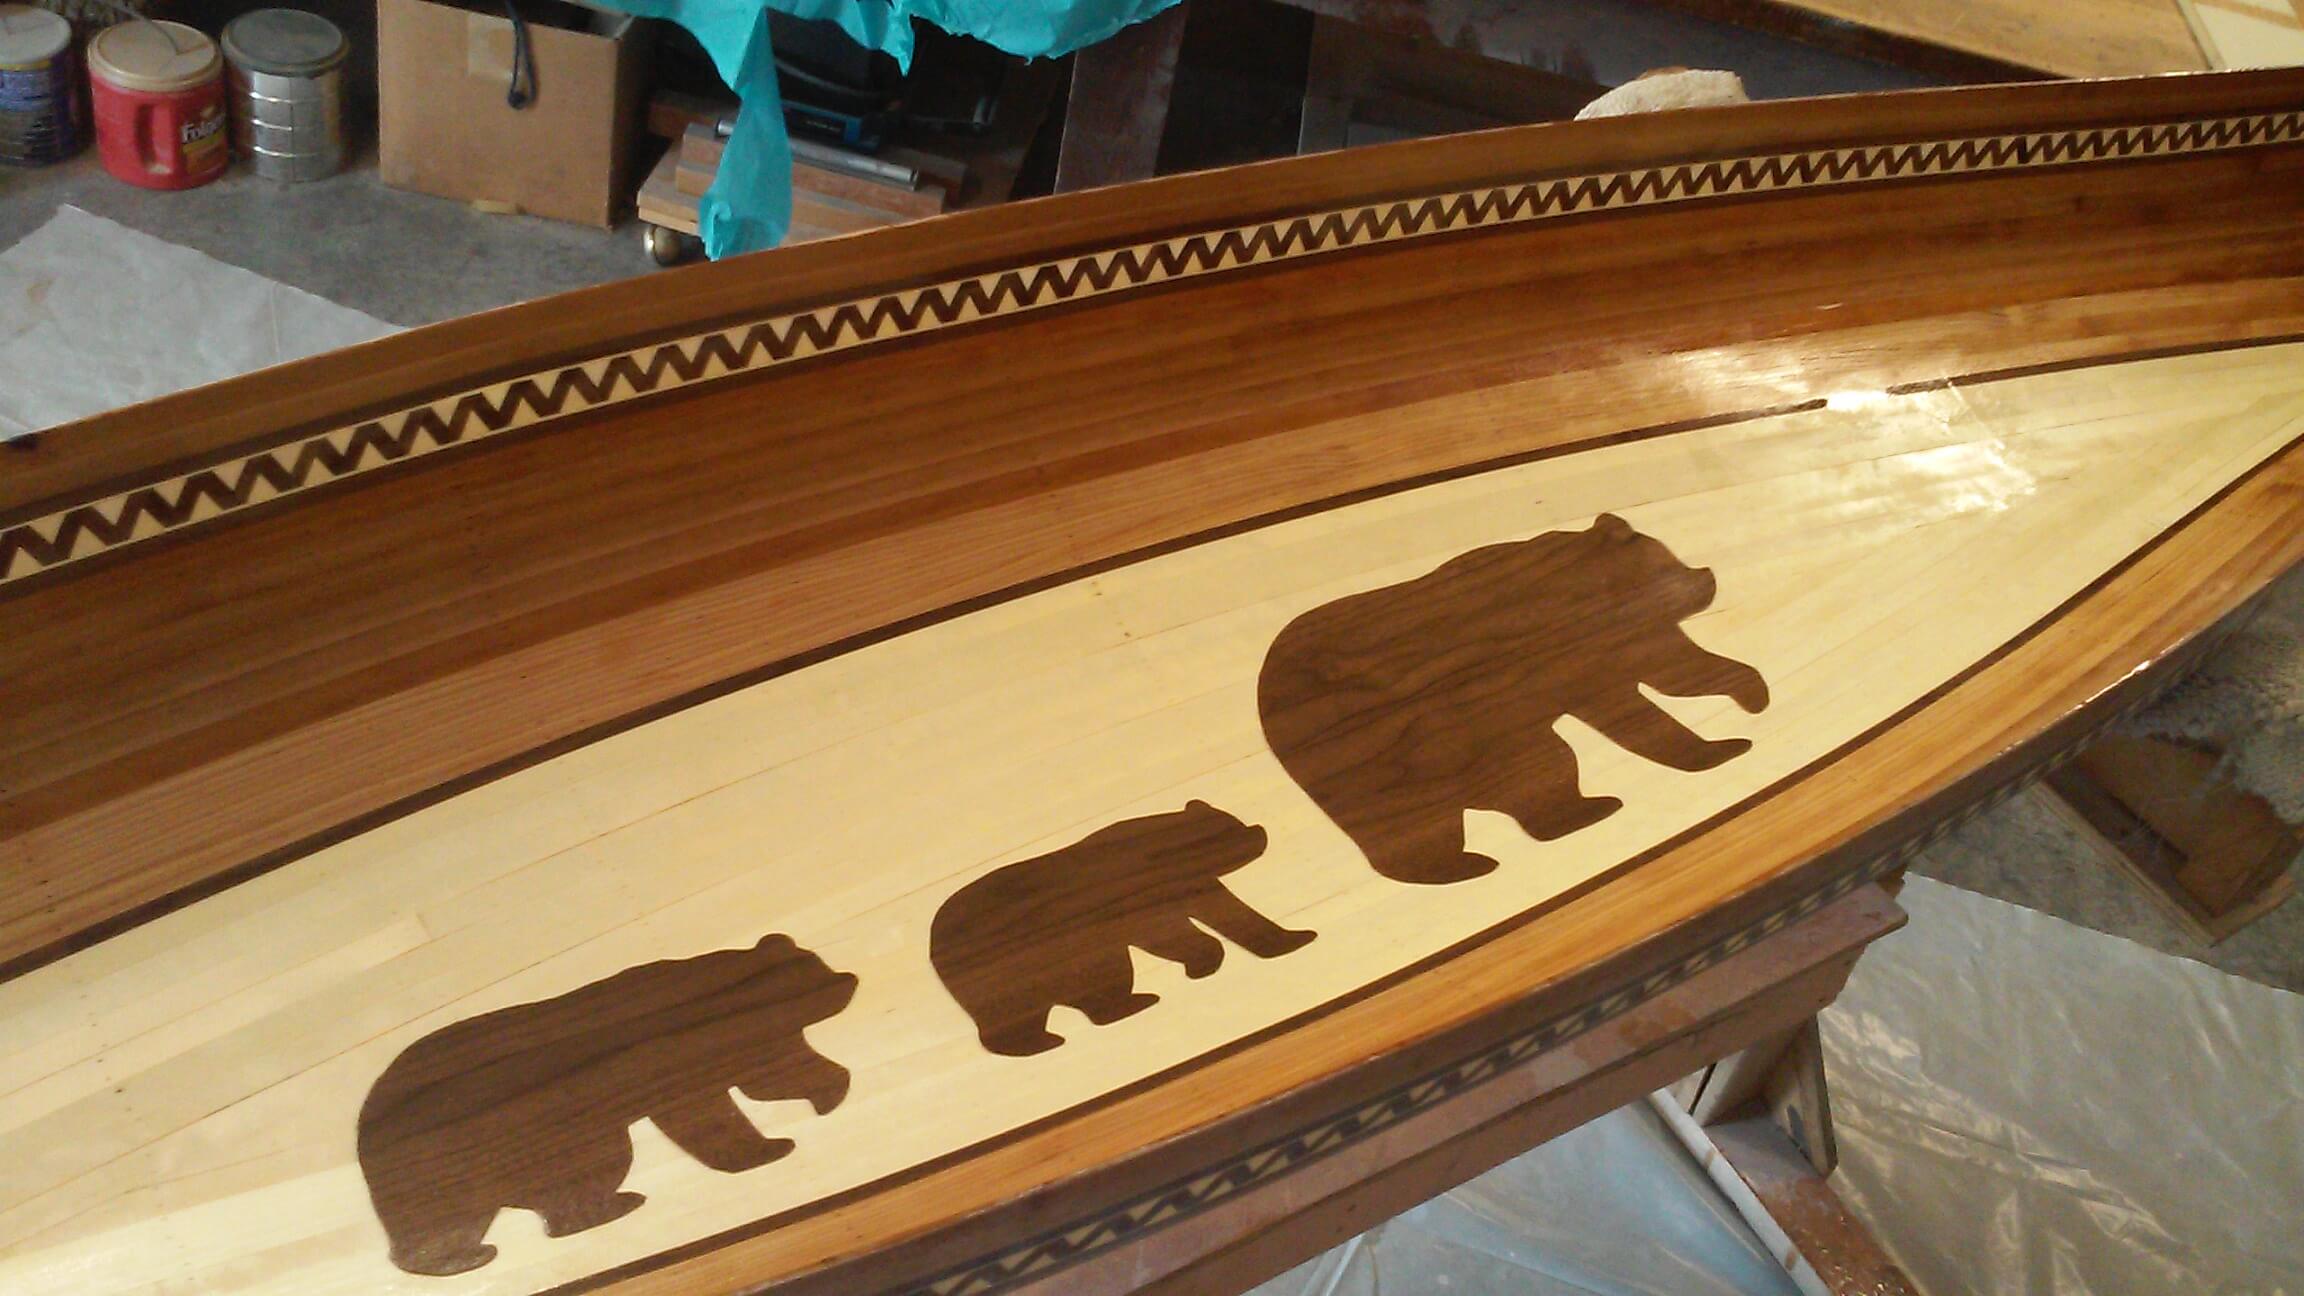
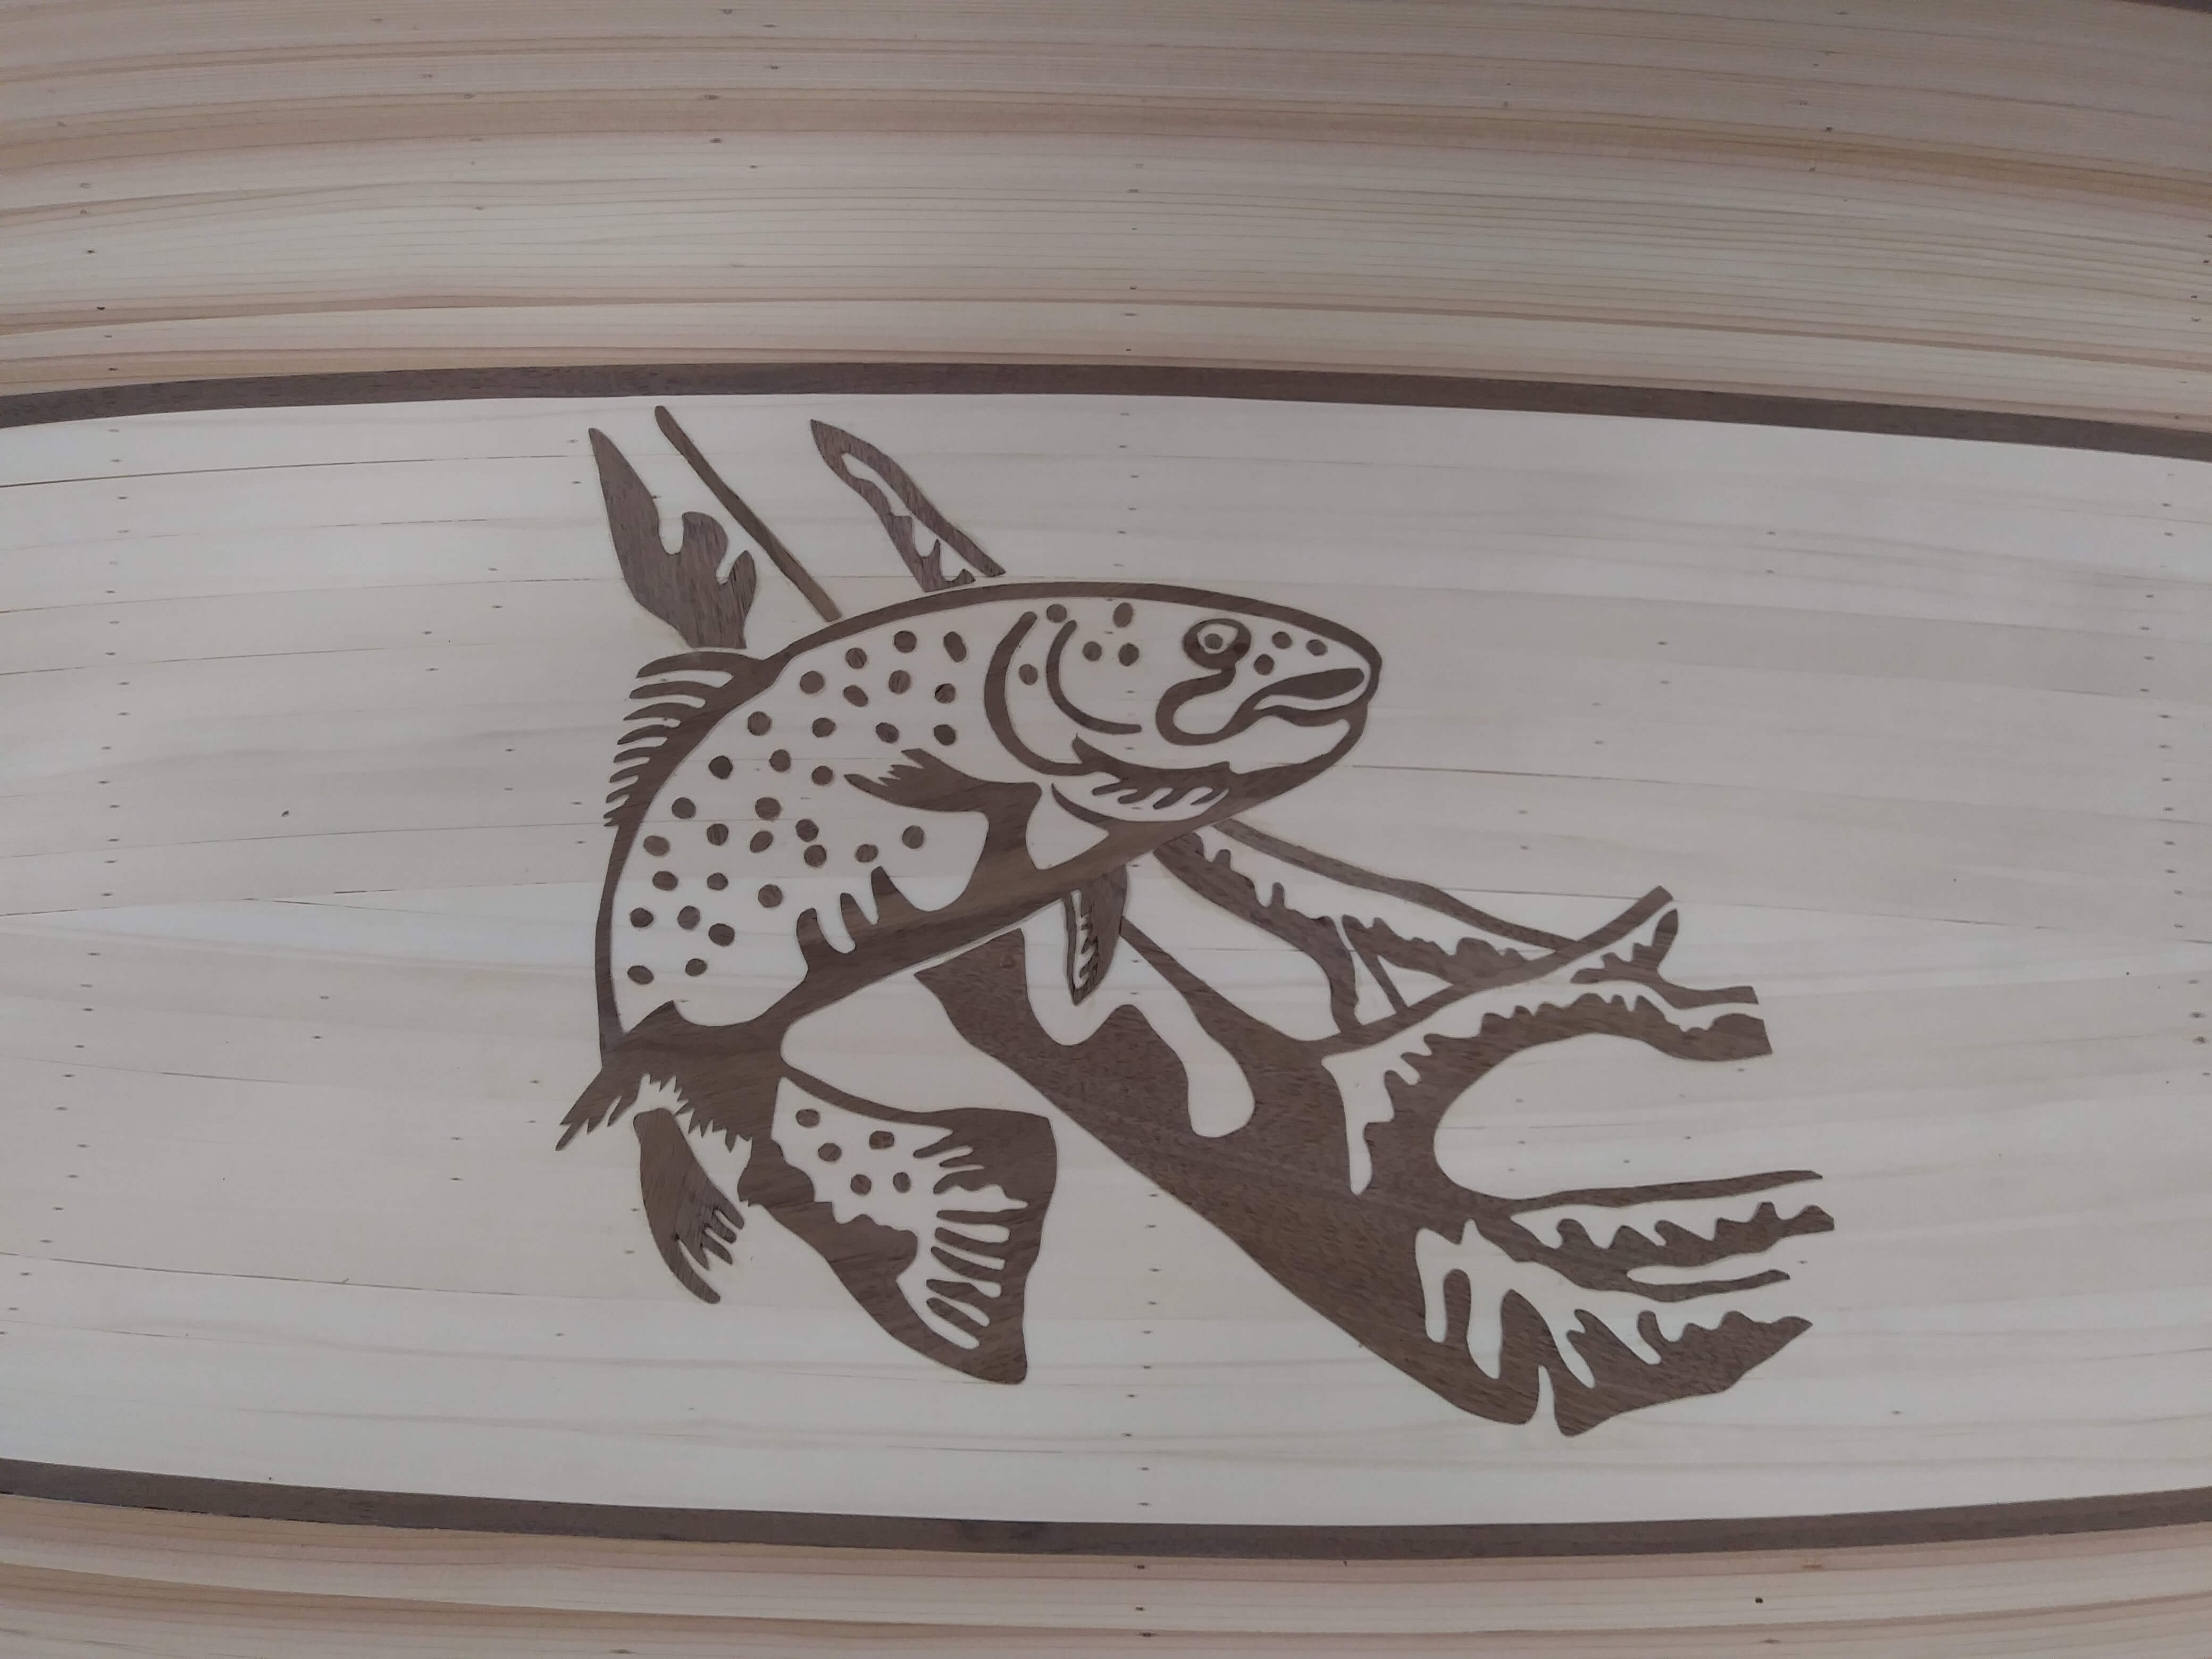
Steve was asked in 2015 about adding 3 bears to the bottom of a 12 foot long display canoe. Mike created the first overlay design on the side on a canoe back in the 1970’s. It was a thunderbird out of white balsa wood on a redwood strip canoe, very striking. Steve remembered what his dad had created and he undertook the challenge. Steve creates these overlay images out of thin wood veneer. Unlike their inlay designs which are visible from both inside and outside, the overlay designs are only seen from the side they are applied too. These designs though do offer them to be more complicated as with a trout scene complete with a lot of spots. The designs are hand cut out, no CNC machine is used.
Once a canoe has been stripped up the next step is to plane and sand the outside smooth. Steve’s favorite part of the creation of a canoe is hand planing the hull. Once the canoe has been sanded smooth the epoxy resin to fiberglass cloth on the outside. This is the true strength of the canoe. It’s amazing how the white fiberglass cloth goes clear when the resin is applied to it. Several coats of resin are applied and then the canoe is sanded smooth again.


So far through the build of the canoe it has been on the forms to create the shape. Now after the cloth and resin have been applied to the outside it is removed from these forms. The canoe is flipped over and the inside is now sanded smooth. This is the least favorite job of everyone, imagine taking a bowl of flour, sticking your head in the bowl and sneezing. Once the inside is smooth it has epoxy resin applied. Larger canoes will also have fiberglass cloth added for strength.
Next gunnels are added to the rim of the canoe with decks on each end. These are the backbone of the canoe and stiffen it up. To complete a display canoe thwarts are added to tie each side to each other. In full size canoes seats are added and a center carrying yoke. We do not add these last items to display canoe as they would cover up the bottom where most often there is a beautiful inlay or overlay awaiting for you to see.


To complete the canoes a clear finish is sprayed onto all surfaces. For a final artistic touch copper is added to both ends. This copper is also added on full size canoes for protection. Our display canoes have been hung on many walls with either a simple leather strap or wooden holders. They are in coffee tables, board rooms, cabins and homes. You really want to bring that lake feel into a room; have one made into a light fixture.


Here at their home in central Minnesota, Amy and Steve work together to create works of art for you. They use time tested methods passed on from over 50 years of canoe building in the Zapf family. Mike’s passion for woodworking was passed onto Steve, Amy has joined in, and even now a fourth generation is being introduced to the Zapf Legacy.

